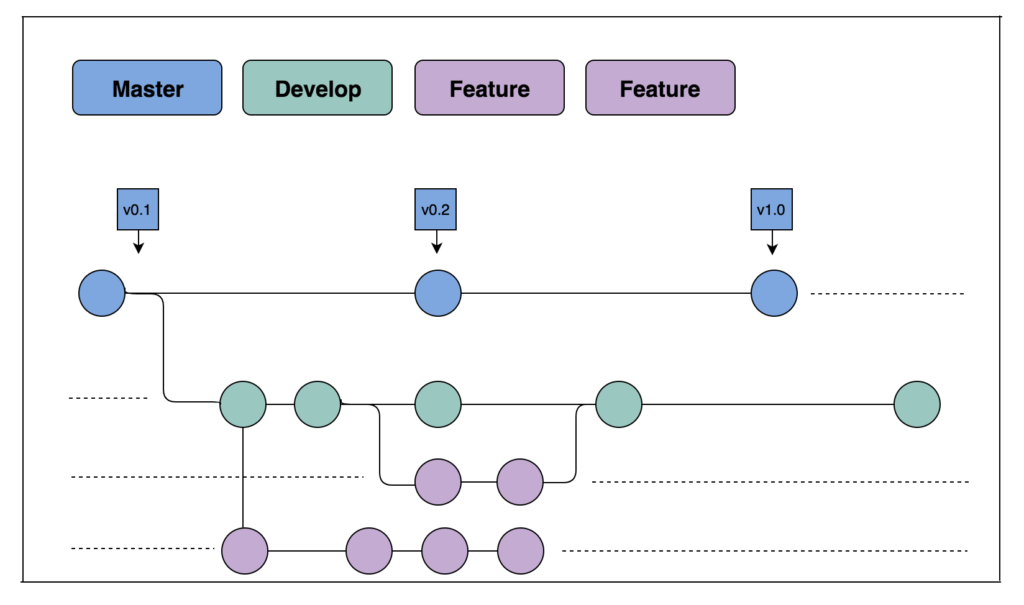
The main branches
- Master
- Develop
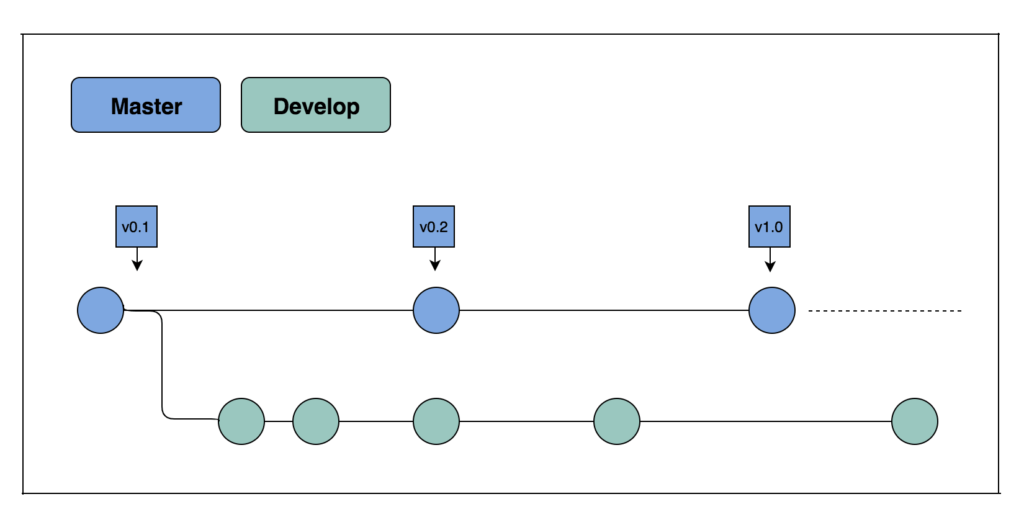
Master branch by default exists in a remote repository when the repository is initialized and first commit has been pushed. Master branch is considered to be the main branch as it has the source code in a Production-ready state.
Initially, Develop branch is created from Master branch so that code changes can be continuously committed to develop branch and leave the master branch undisturbed.
When a stable point is reached for the source code in develop branch and is ready to be released to higher environments like pre-prod and prod, the changes are merged to Master and can be tagged with respective Release version numbers.
Supporting branches
Along side Master and Develop branches there would be variety of supporting branches to support parallel development between team members, to track the features, prepare for production releases and to fix the live production problems.
These below branches are the supporting branches users may use in their projects.
- Feature branch
- Release branch
- Hotfix branch
All these support branches have a specific purpose and have the strict directions to create from which branch and merge back to which branch.
Feature branch
It may branch off from:
Develop
Must merge back into:
Develop
Branch naming convention:
Can be anything except master,develop,release-* or hotfix-*.
Feature branches are used to create new feature(functionality) for upcoming or future releases.When development of a feature starts, it will be unclear whether this feature will be integrated in which target release is so feature branch would exist as long as the feature is in development.
It will ultimately merge back into the Develop branch.But, if the feature is certainly applied to the upcoming release or discarded if not needed.
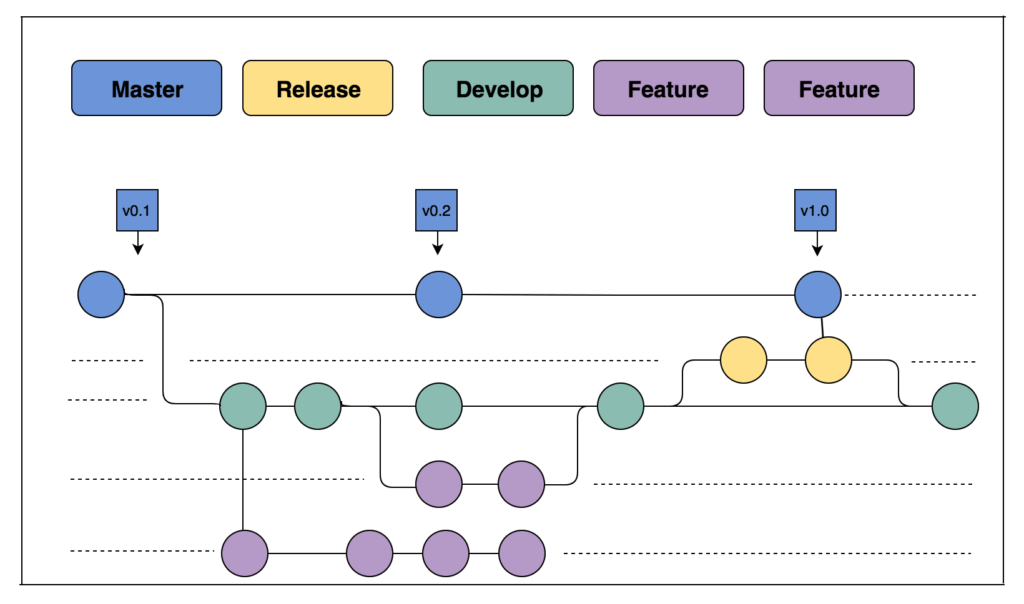
Release branch
It may branch off from:
Develop
Must merge back into:
Develop or Master
Branch naming convention:
release-*
Release branches can be used for preparation of new production releases and for minor bug-fixes which helps to keep the Release process independent of Development process occurring continuously on Develop branch.
It is important to create this branch from Develop at the right moment where the code is in a ready-to-release state and all the necessary Feature branches to achieve the target are merged to the Develop. Other Feature branches that are not targeted for the release should not be merged to Develop until the Release branch is branched off.
During this Release process once the release branch is branched off from Develop, a release version number can be assigned.
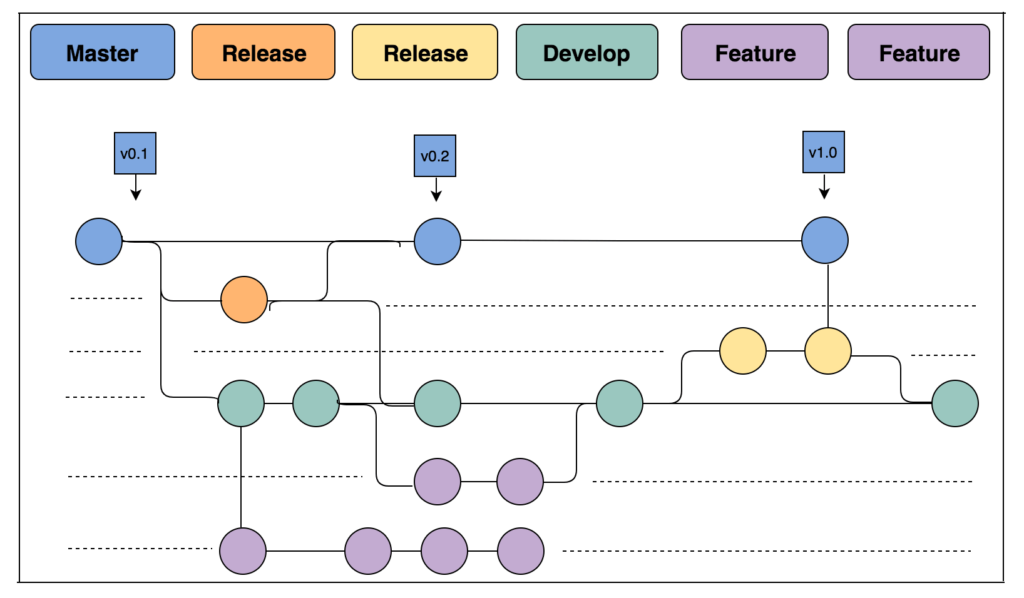
Hotfix branch
It may branch off from:
Master
Must merge back into:
Develop and Master
Branch naming convention:
hotfix-*
Hotfix branches are usually like Release branches where they are mostly used for the purpose of performing any bug-fixes when the code is already in live Production state and any issue occurs.
When the issues are considered critical and have to be resolved immediately, a Hotfix branch can be branched off from the Master branch which has the stable release code.
Merge branches
Merging branches can be done in different ways. One is by using git command line and another is to create pull request to merge the branches. Merging branches with pull request is helpful for the development teams to have the code reviews as the code changes would be merged only if approved by other team members.
Merge branches with git commands
Merging branches can be done by using git merge command. It is important to checkout to the branch which needs to get the other branches’ changes. Then mention the name of branch that changes are coming from with git merge command.
command : git merge <name of the branch>
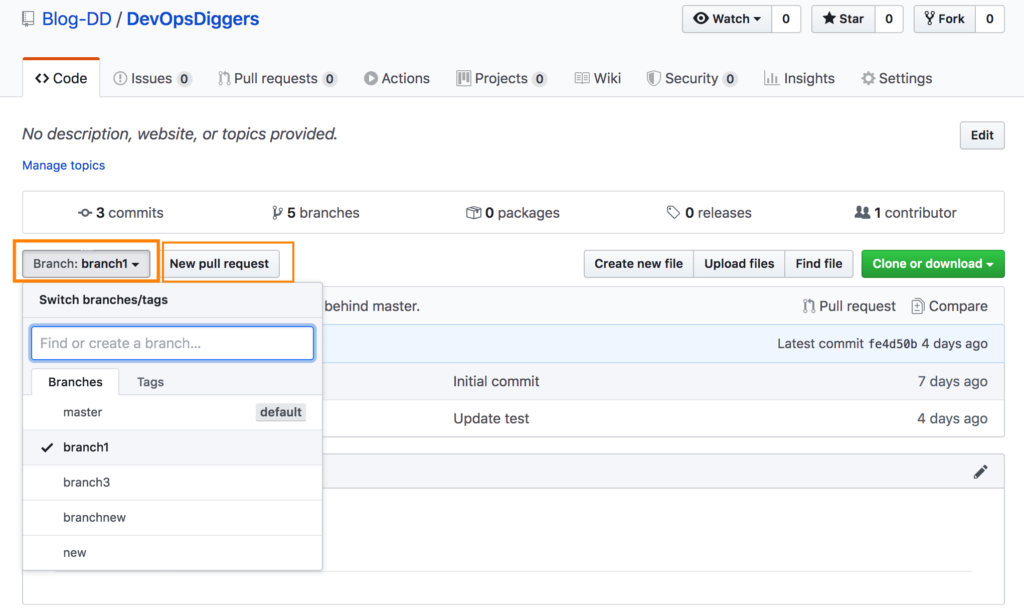
Create Pull Request
On GitHub, navigate to the main page of the repository. In the “Branch” drop-down menu, choose the branch that contains commits to be merged and click on New pull request option.
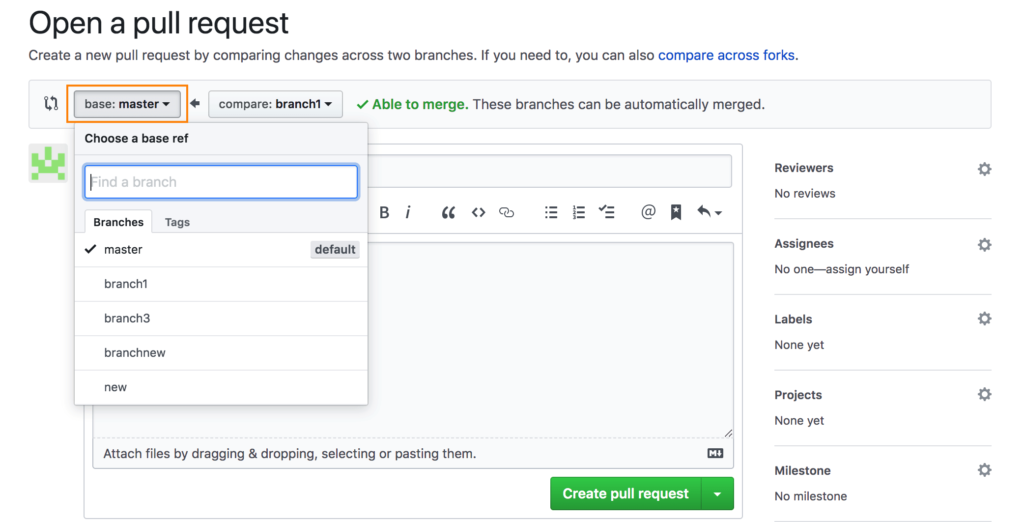
Use the base dropdown menu to select the branch to which the changes are to be merged into, then use the compare drop-down menu to choose the branch where the changes are made.
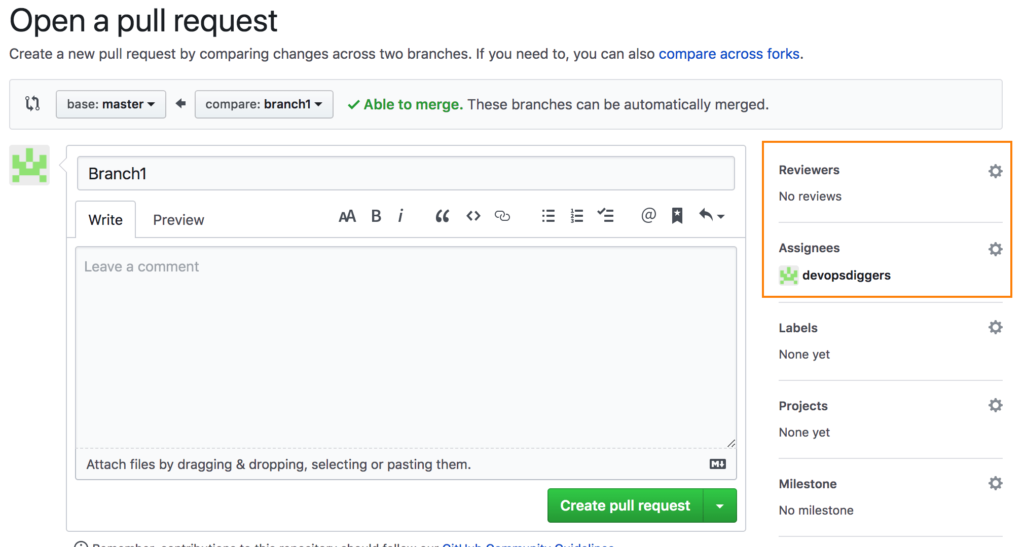
In order to request someone to review the code, add their details ( User ID or email address) in Reviewers and Assignees on the right side menu.
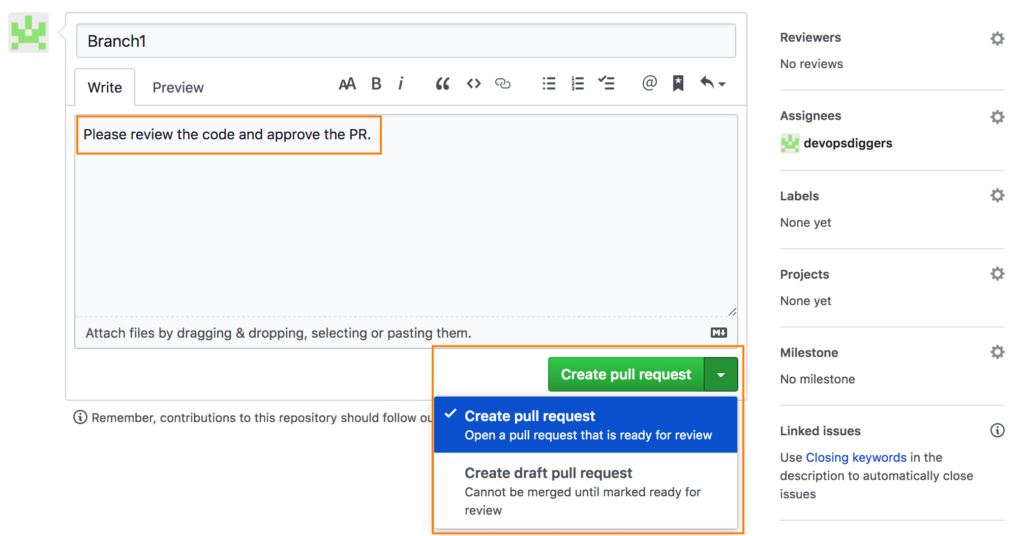
Write a title and description for pull request. Click on “Create pull request” to get the PR submitted.
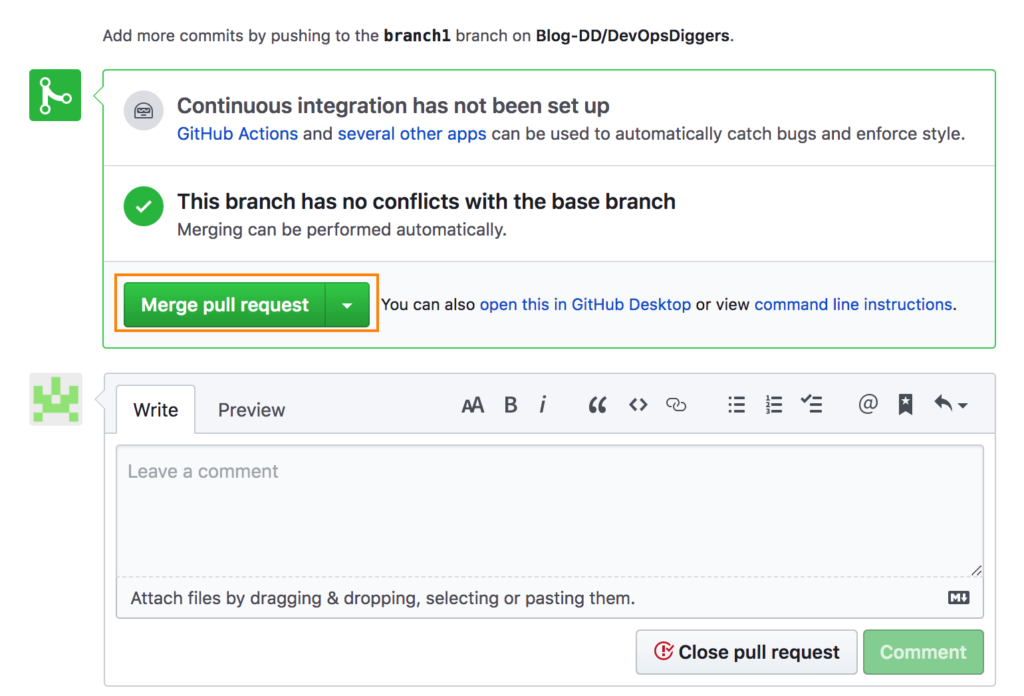
Reviewers review the code and approve the Pull request if appropriate which would be notified through an email, then click on “Merge pull request” to merge the changes.